# Data source
Agreement
In OneNET View 2.0, all data that is ultimately conveyed to a component is required to be an array of objects, even if the component receives data from only one data point. For example: Final data received by broken line graph:
[
  {
    "x": "2010/01/01 00:00:00",
    "y1": 375,
    "y2": "1"
  },
  {
    "x": "2010/01/01 00:00:00",
    "y1": 180,
    "y2": "2"
  },
  {
    "x": "2010/02/01 00:00:00",
    "y1": 200,
    "y2": "1"
  },
  {
    "x": "2010/02/01 00:00:00",
    "y1": 100,
    "y2": "2"
  },
  {
    "x": "2010/03/01 00:00:00",
    "y1": 25,
    "y2": "1"
  },
  {
    "x": "2010/03/01 00:00:00",
    "y1": 125,
    "y2": "2"
  },
  {
    "x": "2010/04/01 00:00:00",
    "y1": 190,
    "y2": "1"
  },
  {
    "x": "2010/04/01 00:00:00",
    "y1": 110,
    "y2": "2"
  },
  {
    "x": "2010/05/01 00:00:00",
    "y1": 90,
    "y2": "1"
  },
  {
    "x": "2010/05/01 00:00:00",
    "y1": 60,
    "y2": "2"
  }
]
Final data received by instrument panel:
[
 {
    "name": "temperature",
    "value": 37.5,
 }
]
We can generate this array of data objects with some configurations.
Data configuration form
After a component is selected, the system will automatically display the data configuration form of the component.
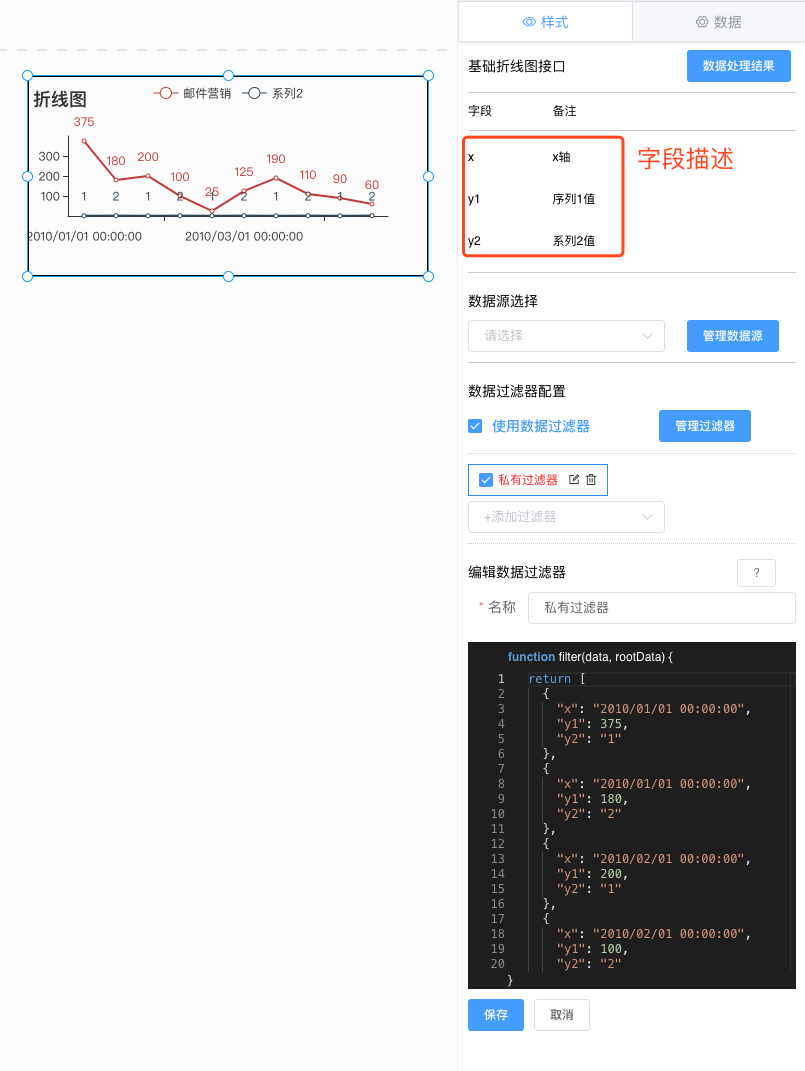
In the field description area, the configurable data items of the current component are listed. Data source configuration and selection create a data source
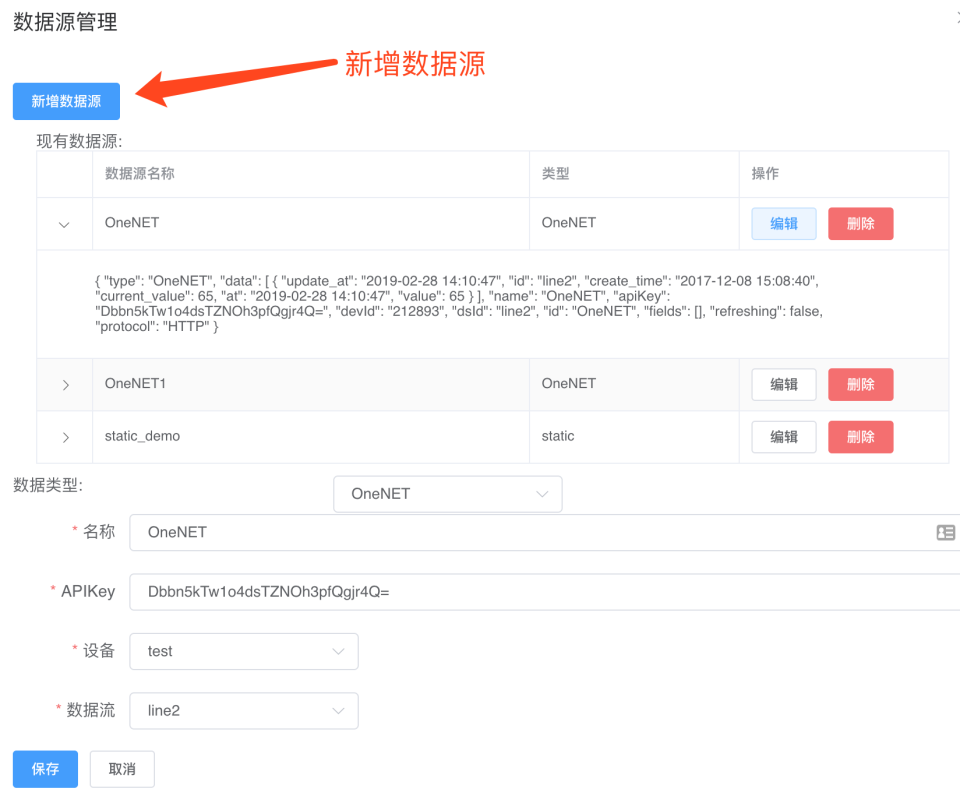
OneNET View 2.0 system adopts the central management mode for data sources in the application. When a component needs to use a certain data, it should properly configure the data source before selecting the data source.
The system will support multiple types of data sources. Take the OneNET data source type for example. We first need to find the product APIKey on OneNET, and OneNET View 2.0 will automatically pull the devices and data streams under the product according to the APIKey; name the data source (which cannot be in Chinese, and no duplicate is allowed in the same application). After selecting the device and data stream, a OneNET data source is created. Click the symbol > in front of the data source entry to display the specific information on the entry.