Message Queue (MQ)
Product Introduction
Quick Start
User Guide
Best Practices
Service Protocol
FAQ
Change Log
Demo Project
This demo mainly takes python as an example to demonstrate how to create a test project step by step for developers who are new to OneNET MQ.
Prerequisites
- Please confirm that python environment has been installed properly on the local computer. If not, please download and install it first.
- Please confirm that the message queuing service has been enabled properly, with service resources created. If not, please finish service enabling and resource creation with reference to Start Guide.
Download a demo project
Download and extract demo projectAfter that, you should be able to find that an OneNET-MQ-Demo-Python folder has been added locally.
Configure a demo project
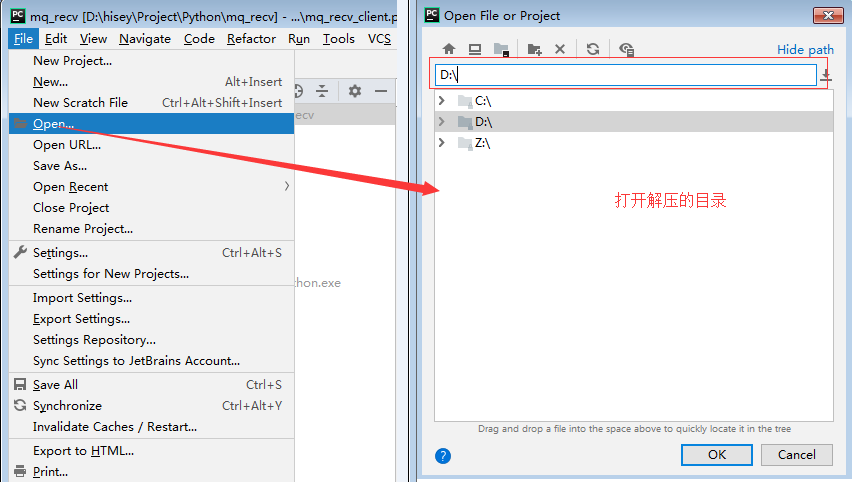
- In IDE (taking JetBrains PyCharm as an example), select File->Open and open the unzipped OneNET-MQ-Demo-Python folder.
- Modify demo variables, and modify lines 102-105 of mq_recv_client.py file according to the resource parameters created on the platform.
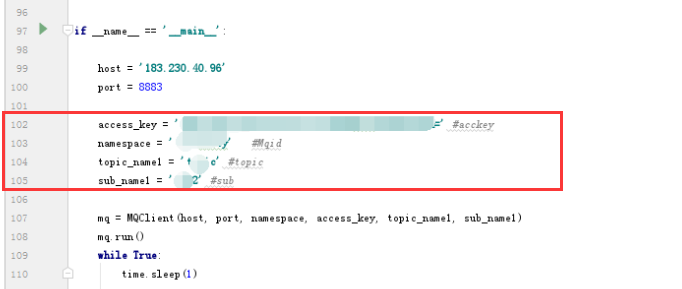
access_key = 'your MQ access_key'
namespace = 'your MQ instance name'
topic_name1 = 'name of topic you created'
sub_name1 = 'name of subscription you created'
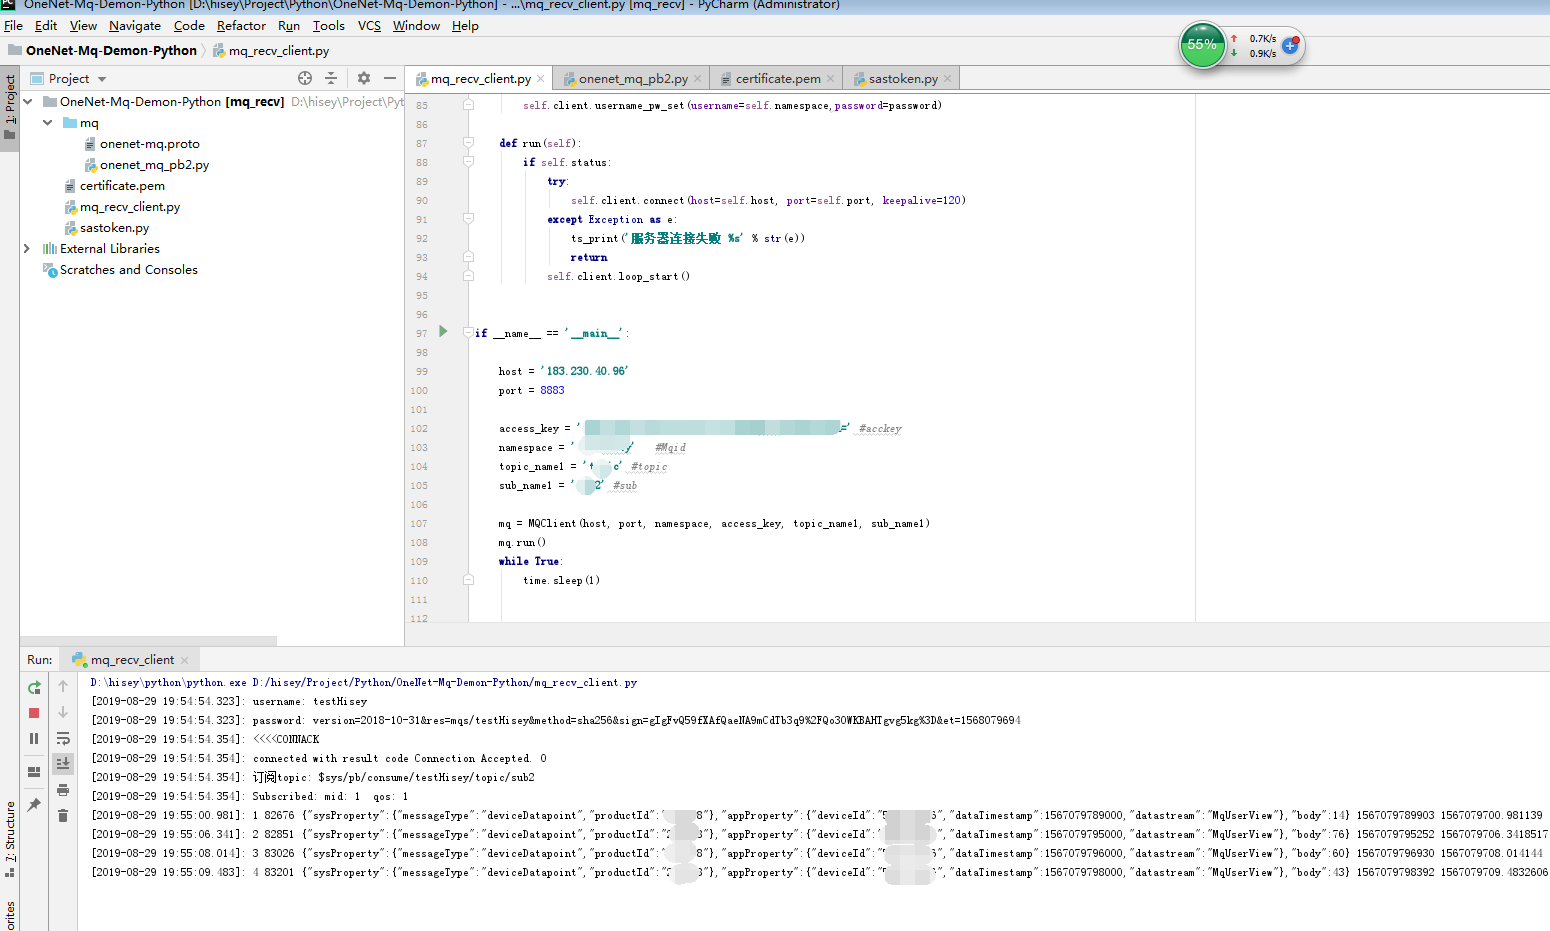
Run demo project
step1:Message production is shown in the Message Production Guide.Please forward messages to MQ topics.
step2:In terms of message consumption, run the main function in mq_recv_client.py to connect to the service and consume messages from the queue. After success, you can observe successfully consumed messages in Console.